
Cloudy Headlights and Condensation: Causes, Fixes and When to Replace Them
Your vehicle’s headlights are essential for seeing the road clearly and helping other drivers see you. However, over time, you may notice that your headlights have become cloudy, yellow or foggy. In some cases, you might even see moisture or water droplets forming inside the headlight assembly.
Although these problems can look similar from the outside, they often have different causes. Cloudy or yellow headlights usually result from deterioration of the outer lens, while condensation develops when moisture collects inside the assembly.
Understanding the difference can help you choose the right solution, avoid unnecessary replacement costs and maintain reliable visibility while driving.
Why Do Car Headlights Become Cloudy or Yellow?
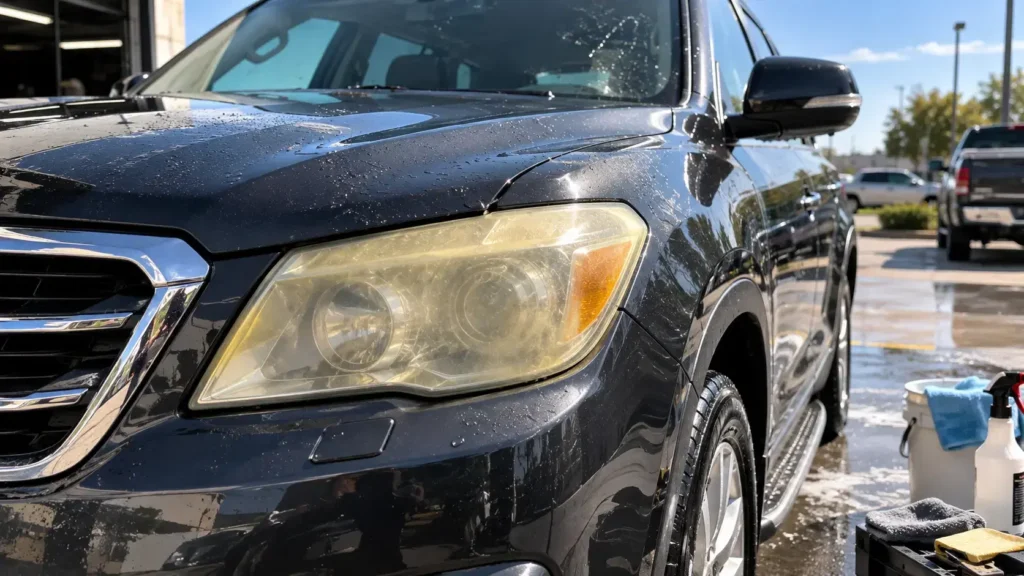
Most modern vehicles use plastic headlight lenses rather than glass. These lenses are lightweight and durable, but their surfaces can deteriorate with age and exposure to the elements.
Common causes include:
1. UV exposure: Prolonged exposure to sunlight can break down the protective coating on plastic lenses, leading to oxidation, yellowing and a cloudy appearance.
2. Road debris and scratches: Small stones, dirt and other road debris can scratch the lens surface, scattering light and making the headlights appear hazy.
3. Weather and environmental exposure: Rain, temperature changes, road grime and airborne contaminants can gradually affect the lens surface.
4. Worn protective coatings: The original UV-resistant coating can deteriorate over time, leaving the plastic more vulnerable to oxidation.
Cloudy headlights can reduce the amount of useful light reaching the road and affect the beam’s effectiveness. If visibility has noticeably deteriorated, the condition should be addressed rather than ignored.
How to Restore Cloudy or Yellow Headlights
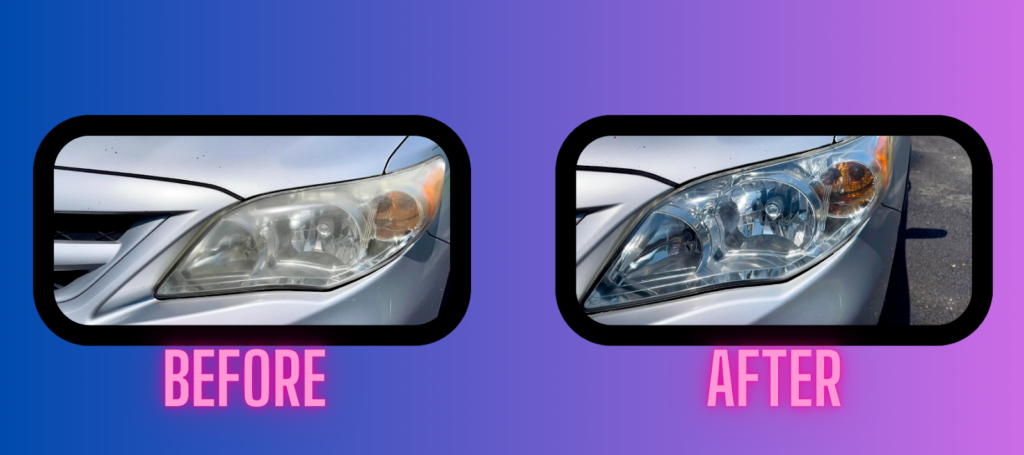
If the headlight housing is structurally sound and the damage is limited to the outer lens, restoration may be a practical alternative to replacing the entire assembly.
1. Clean the Headlight Surface
Start by washing the lens with automotive soap and water to remove dirt, dust and road grime. Dry it with a clean microfiber cloth.
Cleaning helps reveal whether the cloudiness comes from surface contamination or deeper oxidation.
2. Use a Headlight Restoration Kit
A dedicated headlight restoration kit may include polishing compounds, sanding materials and instructions for treating oxidized plastic.
Follow the product’s directions carefully. Depending on the kit, the process may involve progressively finer abrasives followed by polishing to improve lens clarity.
Protect the surrounding paintwork and avoid getting abrasive materials on other vehicle surfaces.
3. Apply UV Protection
Restoration can remove the damaged surface layer, but the lens may become cloudy again if it is left unprotected.
Use a suitable UV-resistant coating or sealant recommended for automotive headlight lenses. Follow the manufacturer’s application and curing instructions.
4. Assess the Results
After restoration, inspect the headlights in good lighting. If significant haze remains, the lens has deep damage, or the headlight beam still appears inadequate, professional assessment or replacement may be necessary.
Remember that polishing cannot repair cracks, damaged internal reflectors or failed electronic components.
What Causes Condensation Inside Headlights?
Moisture inside a headlight assembly is a different problem from an oxidized outer lens.
Many modern headlights are not completely airtight. They use ventilation systems to manage pressure and temperature changes. When warm, humid air inside the assembly cools, moisture can condense on the inner surface of the lens.
A light mist that appears temporarily after rain, washing or a sudden temperature change may be normal for some headlight designs.
However, persistent fogging, large water droplets or water pooling inside the housing may indicate a problem.
Common causes include:
- Damaged seals or gaskets: Deteriorated seals can allow excess moisture to enter the assembly.
- Cracked headlight housings: Impact damage or age-related deterioration can create openings for water.
- Blocked or damaged vents: Improper ventilation can interfere with moisture management.
- Incorrect installation: A replacement bulb, rear cover or headlight assembly that is not fitted correctly may compromise the seal.
Persistent moisture should be investigated because it can contribute to corrosion, lighting faults and damage to electrical components.
How to Fix Moisture or Condensation Inside Headlights
The right solution depends on how much moisture is present and what is causing it.
1. Determine Whether the Condensation Is Temporary
Observe whether a light mist clears after the headlight has been operating or after weather conditions change. Consult the vehicle manufacturer’s guidance because acceptable condensation behaviour varies by design.
If the moisture disappears and does not return excessively, repair may not be necessary.
2. Inspect the Housing and Covers
Look for visible cracks, damaged rear covers, loose fittings or signs that the assembly has been improperly installed.
Do not remove covers or disturb electrical components unless you can follow the manufacturer’s procedure safely.
3. Check the Seals and Ventilation
If condensation persists, have the headlight’s seals, vents and housing inspected. Replacing a damaged gasket or correcting a blocked vent may resolve the problem without replacing the entire assembly.
Avoid sealing every opening indiscriminately. Some headlights require functioning vents to regulate pressure and moisture.
4. Address Standing Water Promptly
If water is pooling inside the headlight, arrange an inspection as soon as possible. Significant water ingress may require the assembly to be removed, dried and repaired or replaced.
Do not assume that drying the inside will permanently solve the issue if the source of the leak remains.
Should You Restore Your Headlights or Replace Them?
Restoration and replacement address different types of damage.
Restoration may be suitable when:
- The outer plastic lens is yellow or oxidized.
- The housing is intact and has no significant cracks.
- The damage is mainly superficial.
- The headlight’s internal components are functioning correctly.
Replacement may be necessary when:
- The housing is cracked or badly damaged.
- Water repeatedly accumulates inside the assembly.
- Internal reflectors or lighting components have deteriorated.
- The lens has severe damage that restoration cannot correct.
- The headlight no longer produces an adequate beam after appropriate repairs.
Some modern LED headlight assemblies have integrated components that cannot be replaced individually. In these cases, the correct repair will depend on the manufacturer’s design and available service parts.
Keep Your Headlights Clear with West Can Auto Parts
Cloudy lenses and moisture inside headlights can both affect visibility, but they require different approaches. Surface oxidation may be resolved through restoration, while persistent condensation often calls for an inspection of the housing, seals and ventilation system.
At West Can Auto Parts, we understand the importance of dependable automotive lighting. Whether you are looking for suitable replacement lighting components or other automotive parts, identifying the underlying problem is the first step towards choosing the right solution.
Visit westcanauto.com or contact your local West Can Auto Parts stores for assistance with your automotive parts needs.
Keeping your headlights clear, properly sealed and in good working condition can help you maintain visibility and drive with greater confidence in changing road and weather conditions.
Disclaimer:
This blog is for educational and informational purposes only. For accurate diagnosis and proper vehicle repairs, always consult a certified automotive technician.